


In the world of home improvement, few projects bring as much joy and functionality as building a deck. Deck framing is the foundation of this transformative process, playing a crucial role in the stability, durability, and safety of your outdoor haven. Whether you're a seasoned DIYer or embarking on your first outdoor project, understanding the intricacies of deck framing is essential. Let's dive deep into the details of deck framing and explore everything you need to know to create a stunning, long-lasting deck.
Understanding Deck Framing Basics
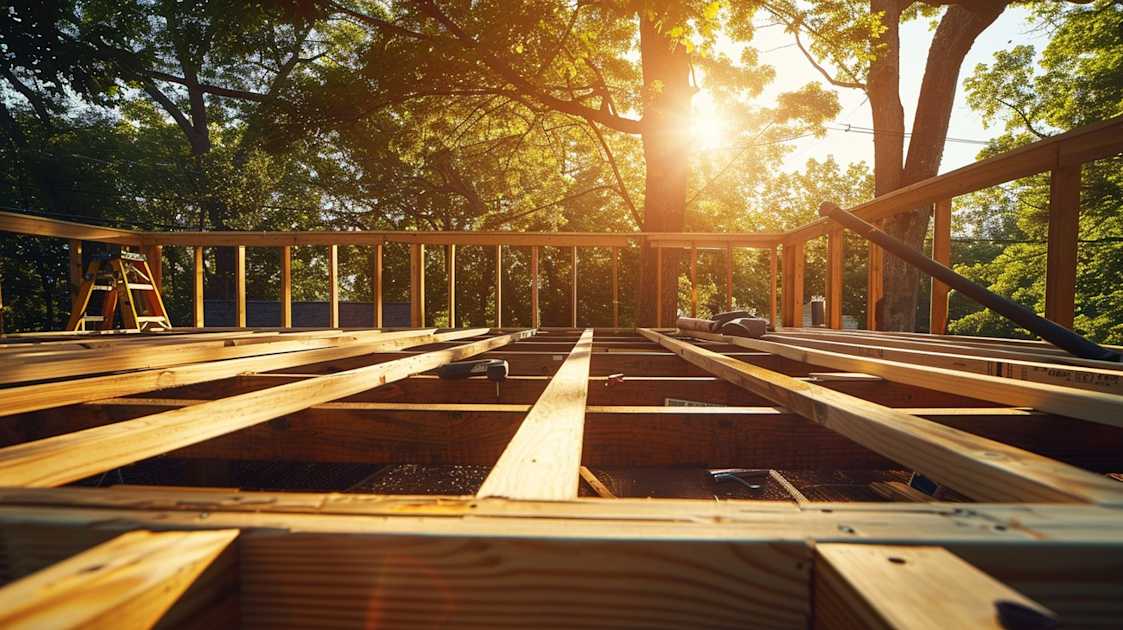
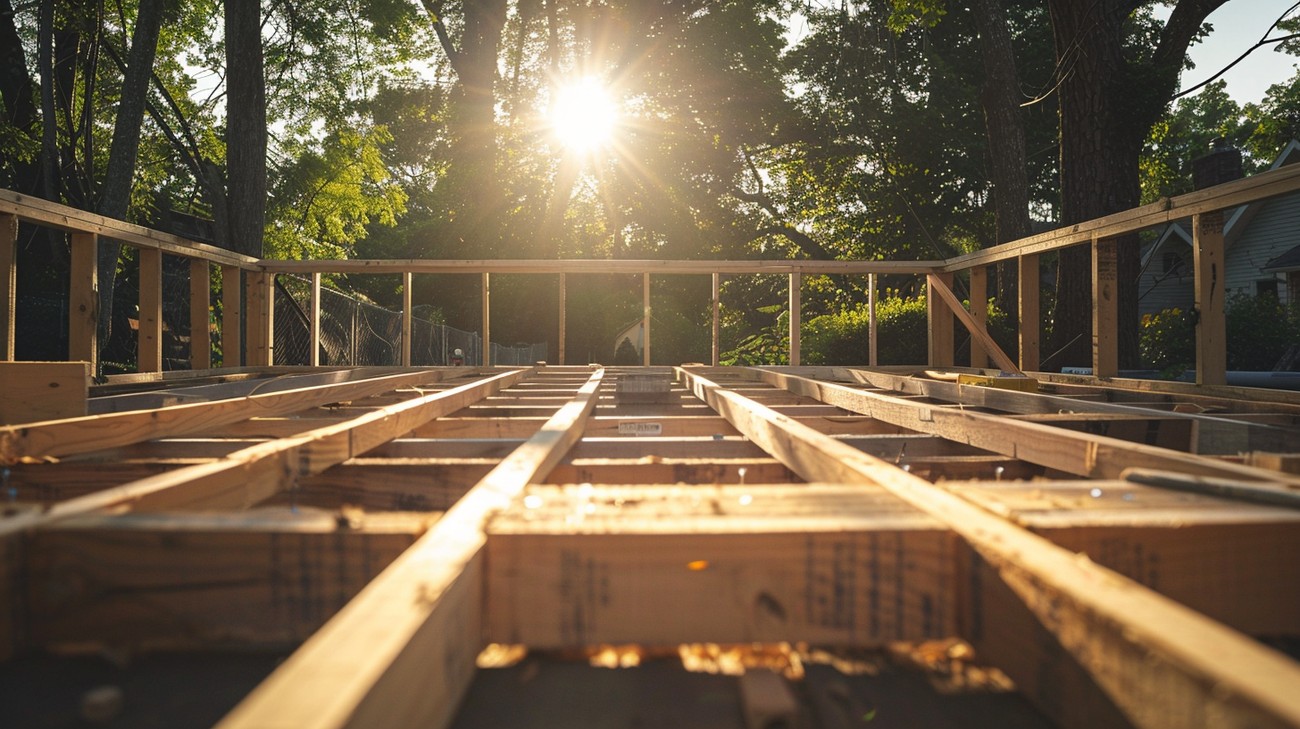
Before you pick up a hammer, it's crucial to grasp the fundamentals of deck framing. At its core, deck framing is the structural skeleton of your deck, comprising beams, joists, and posts. These components work in harmony to support the deck boards and relay weight safely to the ground.
Importance of Accurate Measurements
Accurate measurements are the cornerstone of a sturdy deck. Any discrepancies in your deck’s framing can lead to an unstable structure.
- Measure Twice, Cut Once: Double-check all dimensions before making cuts. It's not just about the length and width; consider height, angle, and spacing for every part.
- Use the Right Tools: Invest in quality measuring tools like a tape measure, framing square, and level. Laser levels can also provide precision on uneven terrains.
Selecting the Right Materials
The choice of materials dramatically impacts your deck's longevity and appearance. When selecting materials for your deck frame, consider the climate, exposure to elements, and budget.
Wood Choices for Deck Framing
Wood is the most common decking material due to its workability and natural beauty. Here's a look at popular options:
- Pressure-Treated Wood: This is an economical choice and resistant to rot and insects, making it ideal for exposed settings.
- Cedar and Redwood: Naturally resistant to rot and decay, they offer an appealing aesthetic with less chemical treatment.
Composite and Metal Options
Alternative options like composites and metals are gaining popularity due to their durability and low maintenance.
- Composite Materials: Eco-friendly and highly durable, composites resist weathering, warping, and splintering.
- Steel and Aluminum: These offer superior strength and longevity. They're an excellent choice for modern designs and high-stress areas.
Structural Integrity
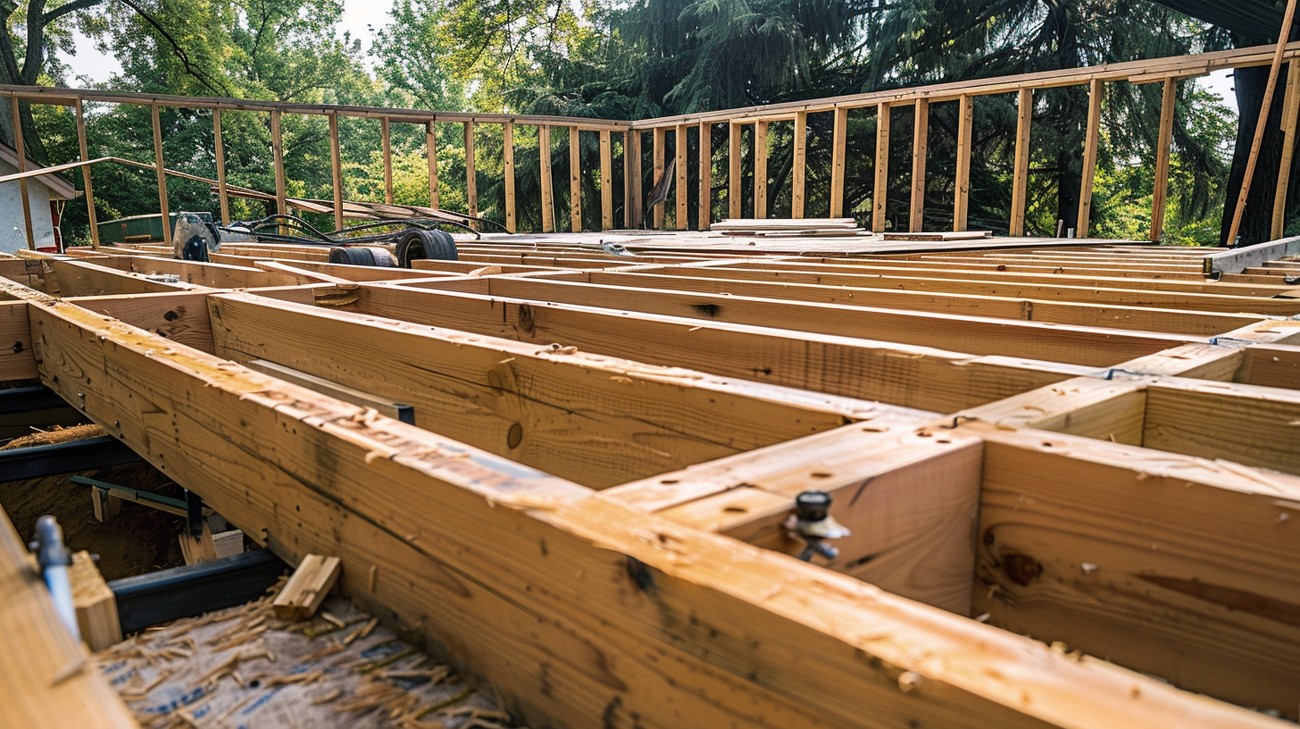
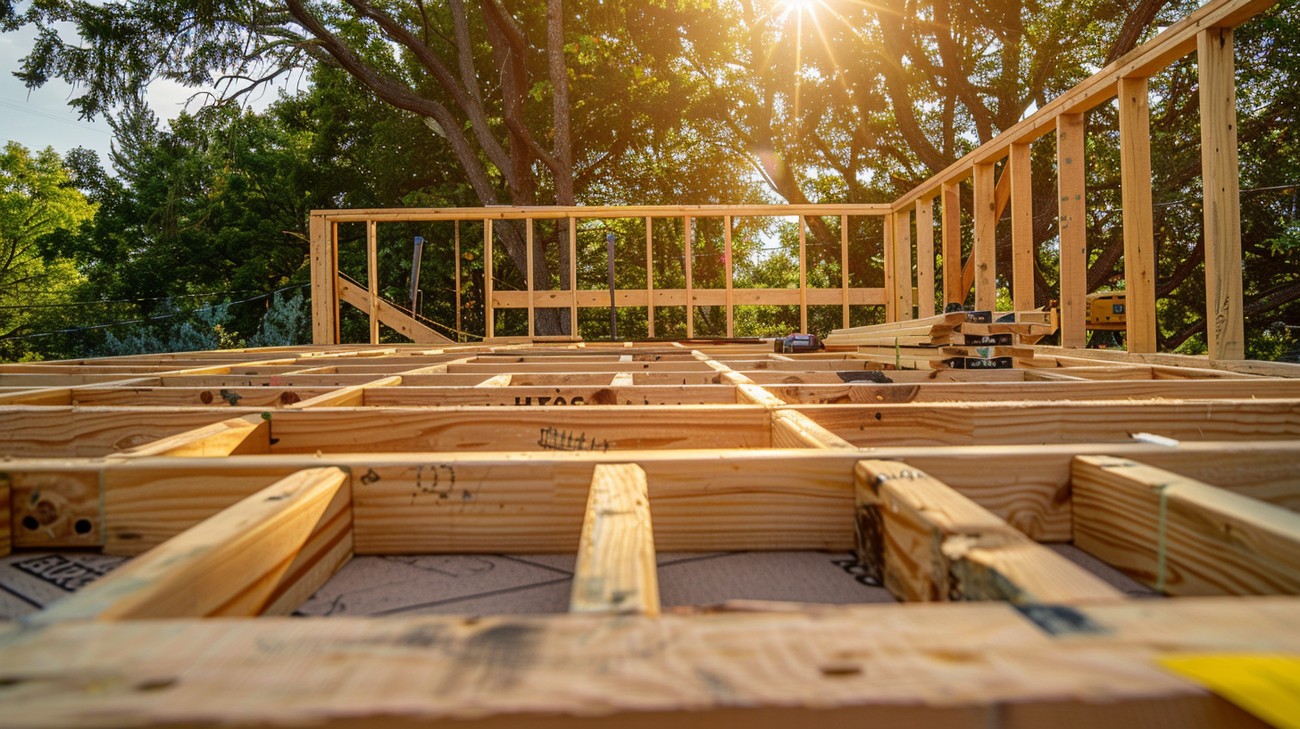
The strength of your deck relies significantly on its framing. Each component—from beams to fasteners—plays a vital role in ensuring your structure can withstand the test of time and the elements.
Joist Installation
Joists are the horizontal structures that provide surface support for the deck boards.
- Spacing Matters: Typically, joists should be spaced 16 inches apart for solid wood decks and 12 inches for composite decks to provide adequate support.
- Use Joist Hangers: These metal brackets enhance stability and ensure that joists remain securely in place.
Securing the Foundation
A solid foundation is indispensable. It distributes the weight of the deck and prevents shifting and settling.
- Footings and Piers: Concrete footings and piers are the most common bases used to anchor decks. They should extend below the frost line to prevent movement during freeze-thaw cycles.
- Post Anchors: Connect the deck posts to the footing, offering extra stability and reducing the risk of rot by elevating wood away from damp ground.
Maximizing Longevity
To maximize your deck's lifespan, consider aspects that might not seem immediately obvious but play a significant role long-term.
Proper Drainage
Water management is crucial to prevent damage and decay.
- Slope Away from the House: Ensure a slight grade to direct water away, reducing the risk of water pooling.
- Use Flashing: Metal flashing helps protect your ledger board and house connection from water damage.
Maintenance Tips
Regular maintenance can extend the life of your deck framing and surface.
- Seal and Stain: Apply a waterproof sealant to exposed wood.
- Inspect Annually: Check for signs of wear, rot, or shifting materials and address issues promptly.
Design Considerations
While structural integrity is key, a deck should complement your home and landscape, offering both beauty and function.
Balancing Aesthetics and Function
A well-framed deck caters to your living needs without compromising on style.
- Integrate Built-In Furniture: Benches or planters can be incorporated into the framing design.
- Consider Multiple Levels: Multi-tiered decks add visual interest and can delineate activity zones, such as cooking and dining spaces.
Accessibility and Safety
Safety and accessibility should never be an afterthought.
- Railings and Banisters: Ensure every edge has a secure railing, especially if elevated.
- Lighting: Inset lights or post lamps improve nighttime safety and ambiance.
Frequently Asked Questions About Deck Framing
Why is deck framing important for building a deck?
Deck framing serves as the backbone of your entire deck construction. It provides the essential structural support that helps your deck withstand various loads and environmental forces. A well-executed frame ensures the longevity and safety of your deck, allowing you to enjoy it for years to come. Without proper deck framing, the stability of your deck could be compromised, leading to safety risks and costly repairs down the road.
What materials are typically used for deck framing?
Deck framing is frequently made from treated lumber due to its strength, affordability, and resistance to moisture. Common materials include pressure-treated pine, which is treated with chemicals to resist rot and insects. In some cases, builders use steel or aluminum for deck framing to achieve a more modern look and improved durability, especially in high-moisture environments. However, wood remains the most popular choice due to its availability and ease of use.
Can I use untreated wood for deck framing?
Using untreated wood for deck framing is generally not recommended because it's highly susceptible to rot, insect damage, and weathering. Untreated wood lacks the protective treatment that pressure-treated lumber has, which can lead to structural failure over time. If you prefer the appearance and environmental benefits of untreated wood, you should consider alternative measures such as sealing or using naturally rot-resistant woods like cedar or redwood, though these may increase costs.
How do I design the framing for a deck to ensure it supports enough weight?
Designing a deck frame to support adequate weight involves calculating live and dead loads, which include the weight of the deck materials and the additional weight from people and furniture. Start by consulting local building codes and standards to determine the minimum requirements. Consider factors like joist size, beam span, and post placement. It's often advisable to work with a professional designer or builder who can help optimize the deck framing for both safety and performance.
What is the typical spacing for deck joists?
The standard spacing for deck joists is typically 12 to 16 inches on center. This spacing provides the necessary support to handle standard loads and prevents deck boards from sagging. However, the exact spacing might vary according to the type of decking material used and the intended load capacity. For example, composite decking might require a closer spacing to prevent flexing. Always check manufacturer recommendations and local building codes for specific guidance on joist spacing.
Can deck framing be modified to add additional features like pergolas or hot tubs?
Yes, deck framing can be designed or modified to include additional features such as pergolas, hot tubs, or other structures. However, these additions often require reinforced support due to their weight and the stresses they impose on the deck. For a hot tub, for example, you would need to ensure the frame can handle the additional water weight and user load by using larger joists and beams. A structural engineer can advise on the necessary modifications to ensure safe and stable integration into the existing deck framing.
What are the signs that a deck frame might need repair or replacement?
Symptoms that your deck framing might need repair or replacement include visible signs of rot or decay, such as discolored wood or soft spots. Creaking sounds when the deck is in use, wobbling posts, or uneven decking surfaces also suggest that the framing might be compromised. Inspect for loose or rusted screws and connectors, as these weak points can quickly worsen. Routine inspections and maintenance will help identify and address such issues early on, potentially saving you from more extensive repairs.
How do you ensure deck framing is level and square?
Ensuring that your deck framing is level and square begins with establishing a firm and even base for your posts. Use string lines, levels, and measuring tapes to frequently check that all components of the frame are aligned correctly as you build. Measure diagonally from corner to corner to confirm the square by ensuring both dimensions are equal. Adjustments can be made by shimming or trimming as necessary to achieve the precise leveling and squaring needed for a stable deck surface.
What tools are necessary for building deck framing?
Essential tools for building deck framing include a circular saw or miter saw for cutting lumber, a power drill or impact driver for fastening screws and bolts, and a post-hole digger for setting foundation posts. Levels and squares are crucial for ensuring proper alignment, while measuring tapes are necessary for accuracy in cutting and spacing. A framing nailer can speed up assembly, though it’s optional depending on your preference for screw versus nail connections.
What are the benefits of using metal connectors in deck framing?
Using metal connectors in deck framing enhances the deck's structural integrity and stability. Metal connectors, such as joist hangers, post bases, and angle brackets, provide stronger, more durable connections than nails or screws alone. These metal components help distribute loads more evenly across the structure, reducing stress at individual points. Additionally, they offer increased protection against environmental factors that can lead to wood splitting or weakening over time.
Step-by-Step Guide
Tools and Materials Needed
Before diving into the task, gather the following tools and materials:
Tools:
- Tape measure
- Circular saw or miter saw
- Power drill and bits
- Hammer
- Carpenter’s square
- Level
- Posthole digger
- String line and stakes
- Safety equipment: gloves, goggles, and ear protection
Materials:
- Pressure-treated lumber (joists, beams, and posts)
- Galvanized deck screws
- Joist hangers
- Concrete mix
- Metal connectors
- Gravel
- Wood preservative
Preparation Steps
Inspect Permits and Codes: Check local regulations to ensure compliance with all building codes and obtain the necessary permits. This step is crucial to avoid fines and structural issues.
Design Your Deck: Determine the size and shape of your deck. Make detailed plans detailing the layout, dimensions, and materials required.
Prepare the Site:
- Clear the area where you’ll build your deck. Remove any plants, debris, and level the ground.
- Use stakes and a string line to outline the deck’s perimeter. Double-check these measurements to ensure accuracy.
Detailed Instructions
Set the Footings:
- Dig post holes with the posthole digger, following your layout and local building codes for depth and width.
- Add 4-6 inches of gravel to the bottom of each hole for drainage.
- Mix concrete and pour it into the holes, inserting metal post anchors before it sets. Allow the concrete to cure for at least 24 hours.
Install Support Posts:
- Cut pressure-treated wood for your posts. Height depends on desired deck elevation.
- Place the posts into the metal anchors, ensuring they’re plumb. Secure them with temporary braces for stability.
Secure the Beams:
- Attach beams to the posts using metal connectors. Make sure beams are level by using the carpenter’s square and a level.
- Double-check all measurements against your plans to maintain accuracy.
Install the Ledger Board:
- This is where your deck attaches to the house. Ensure it's bolted securely, as this will provide crucial support.
- Use lag screws and pre-drill holes to prevent the wood from splitting. Keep a consistent margin from possible water infiltration points.
Set Up Joists:
- Begin by attaching joists to the ledger board using joist hangers. Ensure they’re evenly spaced, following your plans.
- Extend joists over beams, attaching them with galvanized deck screws. Check that each joist is level and aligned.
Add Lateral Blocking:
- Install blocking between joists for additional stability and to prevent twisting. This step is often recommended by codes and adds crucial structural integrity.
Tips for Success
- Precision is Key: Measure twice, cut once. Accurate measurements save time and materials.
- Square as You Go: Use the carpenter’s square regularly to keep your structure aligned.
- Stay Level: Constantly check and adjust to make sure joists and beams remain level.
What to Do if Something Goes Wrong
- Misaligned Joists or Beams: Adjust them before proceeding to the next steps. Use a pry bar for small shifts, or unscrew, realign, and secure again.
- Unlevel Post: Retighten braces, and use shims under the beam until level is achieved. Ensure the fix is secure.
- Incorrect Measurements: Sometimes, you’ll need to re-cut materials or brace them differently. Keep extra materials on hand for quick fixes. Remember that starting with accurate plans is essential to avoid major revisions.
- Structural Concerns: If you feel unsure about the deck's stability, consult a professional. It’s better to be safe than sorry on such an important structure.
Common Mistakes to Avoid
1. Incorrect Joist Spacing
Improper joist spacing can lead to a bouncy or even unsafe deck. This mistake often arises from a misunderstanding of load expectations or using the wrong reference for wood strength.
How to Avoid: Always refer to local building codes or professional guidelines, which typically suggest spacing joists no more than 16 inches apart, depending on the decking material. Calculating the load capacity of your deck and matching it with appropriate joist specifications is crucial.
If You’ve Already Made the Mistake: If your deck feels springy, consider reinforcing it by adding additional joists or sistering the existing ones. Expert advice suggests consulting with a structural engineer to ensure the structural integrity of your deck.
2. Not Using Pressure-Treated Wood
Neglecting to use pressure-treated wood can lead to premature deterioration and vulnerability to insects and rot. Often, people make this mistake to save costs or due to a lack of knowledge about wood types.
How to Avoid: Educate yourself on the types of wood available and their treatments. When in doubt, opt for pressure-treated or naturally rot-resistant wood like cedar or redwood for longevity.
If You’ve Already Made the Mistake: Inspect your deck regularly for signs of rot or termite damage. It might be necessary to replace unsafe sections with treated wood. Experts recommend periodically sealing untreated wood to prolong its life.
3. Improper Ledger Board Attachment
The ledger board’s role is crucial, as it's the connection between the deck and your home. Mistakes here, such as not using the proper fasteners or failing to flash it, can cause water damage and structural failure.
How to Avoid: Use ledger screws or bolts rather than nails, and ensure you install flashing above the ledger to prevent water intrusion. Always check for a solid, secure attachment to the house structure.
If You’ve Already Made the Mistake: Replace nails with appropriate fasteners if necessary. Apply flashing retroactively, ensuring no gaps exist for water to infiltrate. Consult with contractors if the damage due to water has already occurred.
4. Skipping Permit Requirements
Skipping the permit process can lead to legal issues and construction that's not up to code. This mistake often happens due to a rush to start building or simply being unaware of local regulations.
How to Avoid: Research your local building codes and permit requirements before beginning construction. Submit your plans and obtain necessary approvals to ensure compliance.
If You’ve Already Made the Mistake: Contact your local building authority immediately to discuss your options. They may require inspections or modifications to bring your project up to code. Consulting with a professional to guide you through retrofitting may also be necessary.
5. Using Incorrect Fasteners
Using the wrong type of fasteners, such as indoor nails in outdoor projects, can lead to rust and eventual deck failure. This happens when builders cut corners or lack knowledge about suitable hardware.
How to Avoid: Use galvanized or stainless steel nails and screws, which are resistant to rust and corrosion. Verify all fasteners are rated for outdoor and treated-lumber use.
If You’ve Already Made the Mistake: Replace unsuitable fasteners with proper ones. Inspect your deck meticulously for signs of rust or looseness.
6. Ignoring Deck Bracing
Neglecting proper deck bracing can lead to a wobbly structure, often due to oversight or attempts to reduce build time and costs.
How to Avoid: Implement diagonal bracing or install a blocking system between joists as recommended by structural guidelines. This ensures lateral stability and overall durability.
If You’ve Already Made the Mistake: Add bracing to the frame where missing. Tighten and secure all connections to eliminate movements. Consulting a structural expert might be optimal for assessing the bracing needs of your deck.
7. Poor Drainage Planning
Without adequate drainage planning, water can pool on or around your deck, causing decay over time. People often overlook this aspect during the design phase.
How to Avoid: Ensure your deck design includes proper sloping away from the house and install drainage systems if necessary. Regularly scan your deck for water pooling after heavy rainfall.
Final Thoughts
When it comes to deck framing, the right approach can make all the difference in ensuring your outdoor space is not just functional but also a joyful extension of your home. We believe it's essential to pay attention to the materials, structure, and design to create a solid foundation that withstands the elements while providing a pleasurable experience for you and your family.
If you're ready to transform your backyard with a beautiful, durable deck, we invite you to reach out to us at US Quality Construction of Columbus. Our team is dedicated to serving homeowners in Columbus, OH, and we're here to help you every step of the way. Whether you need guidance, a consultation, or a free estimate, we’re just a call away to turn your vision into reality.
Tags: wood, construction, outdoor maintenance,


