


When it comes to creating an enchanting outdoor space, the allure of a pergola is undeniable. These charming structures can transform your backyard into a serene sanctuary for relaxation and entertainment. Whether you’re a seasoned DIY enthusiast or a beginner looking to undertake your first project, our comprehensive guide will walk you through every step of pergola installation, providing you with detailed insights and practical tips to ensure success.
Understanding Pergolas
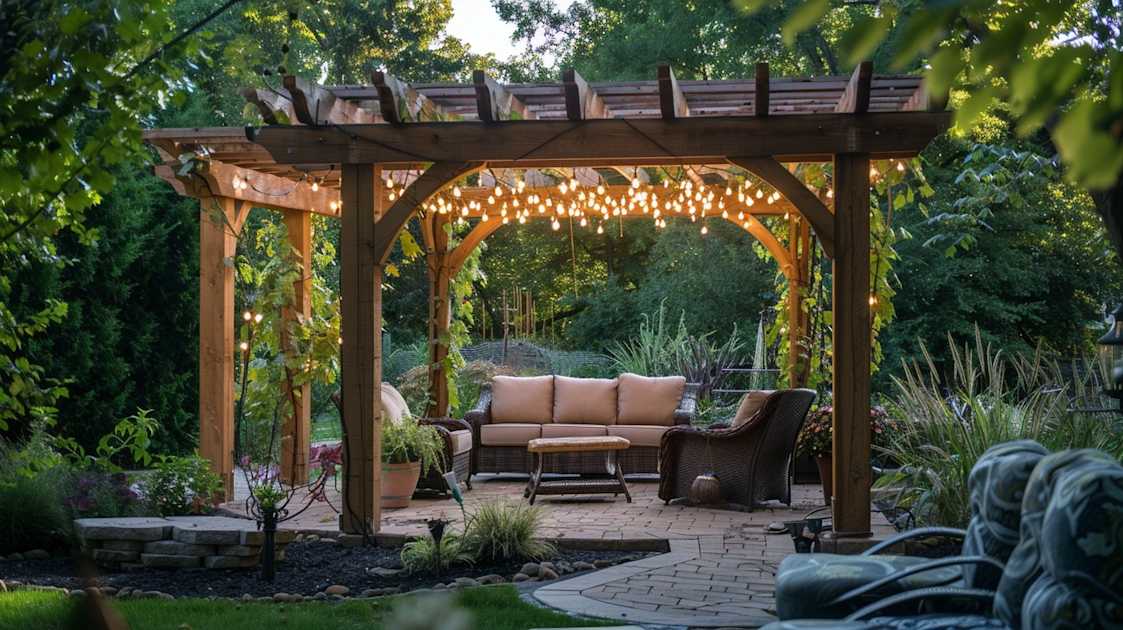
A pergola is an outdoor garden feature, often consisting of a framework covered with trained climbing or trailing plants. It provides a versatile structure that offers partial shelter and is perfect for enhancing your landscape design. Pergolas can come in various materials, styles, and sizes, making them adaptable to a wide range of home aesthetics.
Why Choose a Pergola?
Adding a pergola to your garden or backyard not only enhances the space visually but also adds value to your property. Here’s why many homeowners opt for pergola installation:
- Aesthetic Appeal: Pergolas create visually captivating spaces, adding character and charm to any setting.
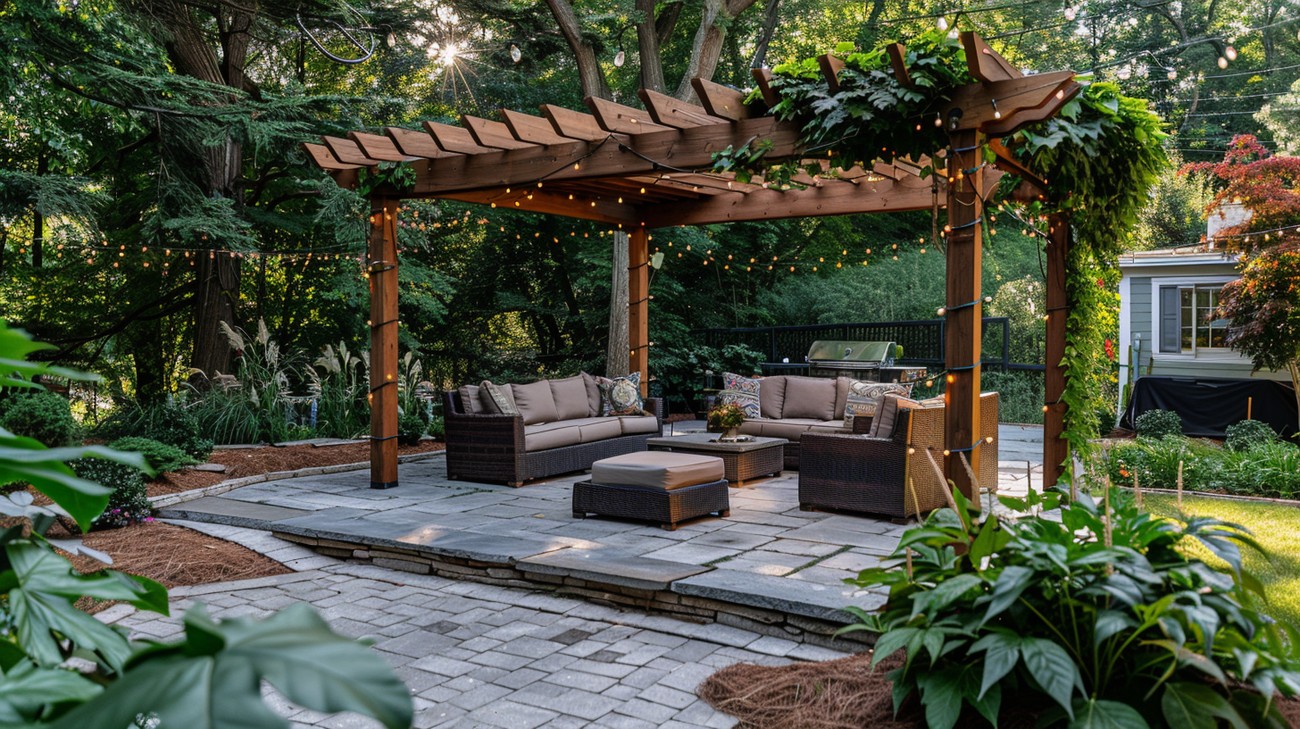
- Functionality: They offer a comfortable and shaded area for dining, entertaining, or simply unwinding.
- Versatility: With a variety of materials and designs, pergolas can be tailored to fit any outdoor aesthetic.
- Value Addition: A well-installed pergola can increase the market value of your home, capturing the interest of potential buyers.
Choosing Your Pergola Style
Before diving into the installation process, it’s essential to select a style that complements your home and landscape. The main types include:
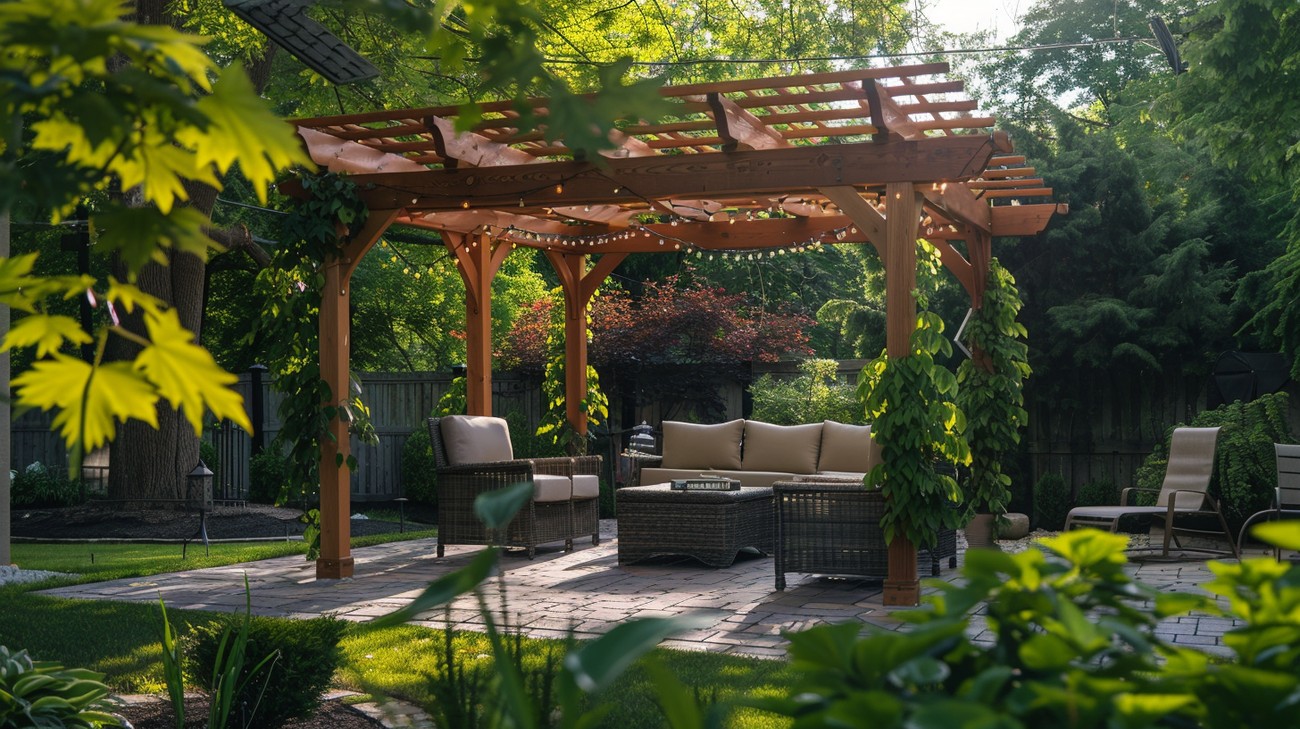
- Traditional Wood: Offers a classic, timeless appeal, perfect for rustic or natural settings.
- Metal: These provide a modern look and can withstand harsh weather conditions better than wood.
- Vinyl or PVC: Requires minimal maintenance and is available in various colors and styles.
- Fiberglass: Lightweight and sturdy, ideal for long-term use without compromise on aesthetics.
Planning Your Pergola Installation
Planning is a crucial part of pergola installation. Here are some key aspects to consider:
Location Selection: Choose a spot that provides the desired amount of sunlight and shade. Consider proximity to your house and utilities like water lines.
Permitting: Check local regulations and obtain necessary permits. Some areas may have restrictions on pergola size or location.
Design and Dimensions: Determine the size and design of your pergola based on the available space and purpose.
Tools and Materials Needed
Having the right tools and materials ensures a smooth installation process. Here's a basic checklist:
- Tools: Tape measure, level, post-hole digger, power drill, saw, carpenter's square
- Materials: Pergola kit or timber beams and posts, bolts and fasteners, concrete mix (if installing on soft ground)
Site Preparation
- Marking the Area: Using a string and stakes, mark the layout of your pergola to ensure proper dimensions.
- Ground Preparation: Clear the ground of vegetation and debris. If needed, level the site using a shovel and rake.
- Foundations: Dig holes for the pergola posts. The depth and width depend on the pergola size, but typically holes should be about ⅓ the height of the post.
Pergola Installation Steps
Setting the Posts: Position the posts in the dug holes, ensuring they are level and plumb. Secure the posts with temporary bracing and pour concrete into the holes. Allow setting as per instructions on the concrete mix package.
Installing Beams: Once the concrete has cured, attach the beams to the posts using bolts. Ensure all beams are level and properly aligned.
Attaching Rafters: Lay out the rafters on top of the beams, spacing them evenly. Secure each rafter with screws or nails. This is where you can get creative, adding design elements like arches or lattice.
Adding Shade Elements: Consider installing shade panels or fabric to your pergola for added comfort.
Tips for a Successful Pergola Installation
- Double-Check Measurements: Accurate measurements prevent alignment issues later in the process.
- Quality Materials: Invest in high-quality materials that resist weathering and provide durability.
- Seek Help: A helping hand can simplify the process, especially when setting beams and rafters.
Maintenance Tips
A pergola requires regular upkeep to maintain its beauty and functionality. Here’s how you can care for your pergola:
- Regular Cleaning: Remove dirt and debris using a soft brush or cloth. For wooden pergolas, clean with a wood cleaner annually.
- Inspect for Damage: Check for signs of wear, such as rust on metal parts or rotting wood. Address these issues promptly to prevent further damage.
- Re-oiling or Staining: Wooden pergolas may require re-oiling or restaining every few years to maintain their appearance and protect against the elements.
Pergola Installation FAQ
How long does pergola installation take?
The duration for installing a pergola can vary based on several factors including the size of the pergola, the complexity of the design, and whether it's a DIY project or done by professionals. Typically, a simple pergola installation can take one to three days. Hiring experienced contractors may expedite the process, especially if they have a team and all necessary equipment. However, custom designs, intricate detailing, or significant groundwork might extend the timeline. Always plan for potential delays and allocate extra time for unexpected challenges during the pergola installation process.
What tools do I need for DIY pergola installation?
Embarking on a DIY pergola installation requires an array of tools to ensure safety and precision. Common tools include a tape measure, spirit level, post-hole digger, and power drill. You'll also need a saw for cutting timber, a hammer, and a set of wrenches. For safety, make sure to have protective gear like gloves and safety goggles. Depending on the pergola design, you might need additional items such as a concrete mixer or ladder. Always double-check the pergola kit instructions to ensure you have the right tools before starting the installation.
What are the benefits of hiring a professional for pergola installation?
Hiring a professional for your pergola installation ensures a high-quality result, often completed more quickly than a DIY attempt. Professionals bring expertise, experience, and specialized tools that guarantee accuracy and safety in structural integrity. They can also offer valuable advice on design, materials, and maintenance. Additionally, hiring a professional often comes with a warranty or guarantee, giving you peace of mind regarding any potential future repairs. This option can be particularly advantageous if you lack time, tools, or experience in handling construction projects.
What materials are best for pergola installation?
Selecting the right materials for pergola installation is crucial for durability and aesthetics. Wood, such as cedar or redwood, is a popular choice due to its natural beauty and resistance to rot and insects. For a modern look, aluminum or vinyl are excellent alternatives, offering low-maintenance and weather-resistant qualities. Steel is another durable option, especially if you're aiming for a sleek, industrial design. Finally, composite materials, which combine natural wood fibers with synthetic plastics, provide the appearance of wood with enhanced durability. Choosing the best material depends on factors like budget, climate, and desired design.
Can a pergola installation increase the value of my home?
A well-executed pergola installation can significantly enhance your property's value by improving its aesthetic appeal and providing a desirable outdoor living space. Prospective buyers often appreciate features that extend usable living areas into the outdoors, especially if the pergola includes additional amenities like curtains for privacy, a fire pit, or integrated lighting. Moreover, a pergola can improve curb appeal and create an inviting atmosphere, which are critical factors during property evaluations. However, the actual value increase may vary based on the quality of materials and installation, as well as local real estate trends.
Is a building permit required for pergola installation?
Whether you need a building permit for pergola installation largely depends on your local building regulations and the specific design of your pergola. In many areas, if the pergola is freestanding, under a certain height, and not connected to the house, you may not need a permit. However, attaching it to the house, incorporating sizeable structures, or complex designs might require one. It's crucial to check with your city or county building department to understand the requirements. Not securing a necessary permit can lead to fines and complications down the road.
How do I prepare the ground for pergola installation?
Preparing the ground is a vital step in a successful pergola installation, ensuring stability and longevity. Start by selecting a level, well-drained area for your pergola. Clear the site of any debris, vegetation, and rocks. If required, use a post-hole digger to create holes for the posts, typically around 2 to 3 feet deep, depending on local frost lines and the height of the pergola. You may need to lay a gravel base and use concrete for stability, especially in areas prone to freeze-thaw cycles. Accurate preparation will help prevent future structural issues or settling.
What type of maintenance is required after pergola installation?
Post-installation maintenance is crucial for preserving the integrity and appearance of your pergola. For wooden pergolas, regular sealing or staining helps protect against moisture, UV damage, and pests. You should inspect for signs of wear, such as cracks or rot, at least once a year. Metal pergolas require less upkeep; however, occasional checks for rust or loose bolts are advisable. Cleaning the structure with a gentle detergent and water occasionally keeps it looking fresh. Keeping vines or climbing plants in check is also important to ensure they don't cause structural stress. Regular maintenance will ensure your pergola remains a beautiful feature in your outdoor space for years to come.
How much does a pergola installation typically cost?
The cost of pergola installation can vary widely based on size, materials, and labor. A basic pergola using DIY methods might cost as little as a few hundred dollars if you opt for low-cost materials like pressure-treated wood and have the needed tools. However, hiring professionals to install a custom pergola constructed from high-end materials like teak or adding amenities such as retractable canopies or lighting can increase costs significantly, often ranging from $2,000 to $10,000 or more. It's beneficial to obtain multiple quotes from contractors and consider your budget and needs to determine the most cost-effective solution.
Can I attach a pergola to my house during installation?
Yes, attaching a pergola to your house is possible and can create a seamless transition between indoor and outdoor spaces. This method often provides added structural support because one side of the pergola is anchored to the home's exterior wall. However, it's essential to ensure proper flashing and waterproofing to prevent moisture ingress and damage to the house. Consulting with a professional is recommended to assure integrity and address any building code or permit requirements. This attachment strategy can enhance the aesthetic appeal and functionality of your pergola, making it an integral part of your home's architecture.
How do I choose the right location for pergola installation?
Selecting the ideal location for your pergola installation involves several considerations. Begin by assessing the sun pattern during the day to determine how much shade you want. A pergola can also be strategically positioned to take advantage of prevailing breezes or act as a buffer against wind. Consider proximity to the house for ease of access, especially if you plan to use it for dining or entertaining. It's also worthwhile to consider views, privacy, and how the pergola will integrate with existing landscaping. Thoughtful placement ensures that your pergola becomes a cherished part of your outdoor living space, enhancing both comfort and aesthetics.
Cost Breakdown
Typical Price Ranges
When you're planning to install a pergola, the pricing can vary significantly, generally falling between $2,000 and $6,000 for a standard size. If you're looking at a basic model, you might find something for less than $1,000, especially if it's a DIY kit. On the other hand, custom designs with high-end materials can escalate costs toward the $10,000 mark or even more.
Factors That Affect Cost
The final cost of your pergola can be influenced by several variables:
- Size and Design: Larger pergolas require more materials and labor. A simple, square design will be more budget-friendly than an intricate or sprawling layout.
- Materials Used: Common materials include pressure-treated wood, cedar, and vinyl. While pressure-treated wood might cost around $10-$25 per square foot, cedar can climb to about $30-$40, with vinyl being a middle-ground choice.
- Location and Labor: Construction costs vary by region. Urban areas or regions with high labor rates can bump up your total. Also, if your property is on a slope or has other accessibility issues, you might face higher installation costs.
- Installation Method: Hiring professional installers will increase your costs, often totaling up to $500-$1,000 for labor alone. DIY installation can reduce these expenses substantially, though it requires more of your time and effort.
Cost Comparison (Budget vs. Premium Options)
Budget choices usually involve DIY kits with no-frills, straightforward designs using economical materials like pressure-treated wood. These can total anywhere from $500 to $1,500. They’re perfect if you're looking for function over fashion. Premium options offer custom designs and often use superior materials like teak or steel, which can easily carry a four-figure price tag before installation costs.
Hidden Costs to Consider
There are a few sneaky expenses that might not be obvious at first:
- Permit Fees: Depending on local regulations, you may need a permit, with fees ranging from $50 to $300.
- Prep and Demo Work: If you need to clear an existing structure or prepare the ground, anticipate additional charges. Ground leveling or concrete pouring for a stable base can cost $500 to $1,000.
- Additional Features: Adding extras like lighting, retractable canopies, or heaters? These can quickly add up, costing $200 to $3,000 depending on the sophistication and number of features.
- Maintenance Costs: High-maintenance woods might save you upfront but require regular treatment and sealing, adding to the long-term cost.
Ways to Save Money
There are opportunities to install a beautiful pergola without breaking the bank:
- Choose Quality Over Quantity: A smaller, well-designed pergola with premium touches can have more impact than a larger, plain one.
- Opt for DIY: If you're handy, a DIY kit can save you considerable labor costs. Be sure you're comfortable with the level of construction involved.
- Research Materials: Opt for composite materials like vinyl or aluminum to balance longevity and aesthetic appeal with cost. They often resist weathering better than wood.
- Seasonal Discounts: Consider purchasing materials during off-season sales or during holiday promotions.
- Shop Around for Installers: Get multiple quotes from contractors and check references. Sometimes, even small negotiation efforts can lower costs.
Timeline & Process
Phase 1: Planning and Design (1-2 weeks)
What happens:
This is your brainstorming phase. You'll decide on the design, size, and materials for your pergola. Consider how it complements your home and existing landscape. During this stage, you might want to consult with a professional designer or use design software to visualize the pergola.
Dependencies and waiting periods: If working with a professional, be prepared for some back-and-forth in feedback and adjustments. Allow time to finalize plans to ensure all your needs and aesthetics are met.
Preparation: Gather inspiration from magazines or online sources. Determine your budget and check local building codes for permits and regulations.
Phase 2: Permits and Approvals (1-3 weeks)
What happens:
You'll need to apply for any necessary building permits. The requirements vary depending on your location and the complexity of your pergola design.
Dependencies and waiting periods: The timeframe here can vary widely depending on local authorities. In some cases, it might take just a week, while in others, it could extend to three weeks or more.
Preparation: Prepare all design documents and be ready to provide any additional information requested by building authorities. Also, it's wise to explore the neighborhood's Homeowners Association (HOA) guidelines if applicable.
Phase 3: Site Preparation (3-5 days)
What happens:
Before building your pergola, make sure the installation site is properly prepared. This includes clearing the area, leveling the ground, and marking the structure's footprint.
Dependencies and waiting periods: Weather conditions can affect site preparation, especially if extensive ground leveling or clearing is required.
Preparation: Coordinate with landscapers or excavation professionals if your pergola requires extensive site preparation. Ensure you have all the necessary tools and materials ready for action.
Phase 4: Materials Acquisition (1-2 weeks)
What happens:
Order and receive all required materials. This includes wood, hardware, and any other components needed for the pergola.
Dependencies and waiting periods: Supplier stock levels, delivery schedules, and material back-orders are factors that can influence timing.
Preparation: Choose suppliers early in the process and confirm availability. It's wise to have a checklist for all materials to avoid surprises.
Phase 5: Construction (3-7 days)
What happens:
With everything ready, construction can begin. This involves erecting the pergola frame, attaching beams and rafters, and securing the structure.
Dependencies and waiting periods: Complicated designs or larger pergolas may require more construction time. Additionally, adverse weather could result in delays.
Preparation: Ensure your toolkits and team (or contractor) are ready to dive in. Have a construction plan on hand and closely monitor the process for quality assurance.
Phase 6: Final Adjustments and Finishing (2-3 days)
What happens:
After installing your pergola, make any necessary adjustments and apply finishing touches like staining, painting, or installing decorative elements.
Dependencies and waiting periods: If you choose to stain or paint your pergola, drying time is a factor to consider.
Preparation: Acquire finish materials—like stains or paints—well ahead of time. Double-check that you have all the necessary finishing tools.
Final Thoughts
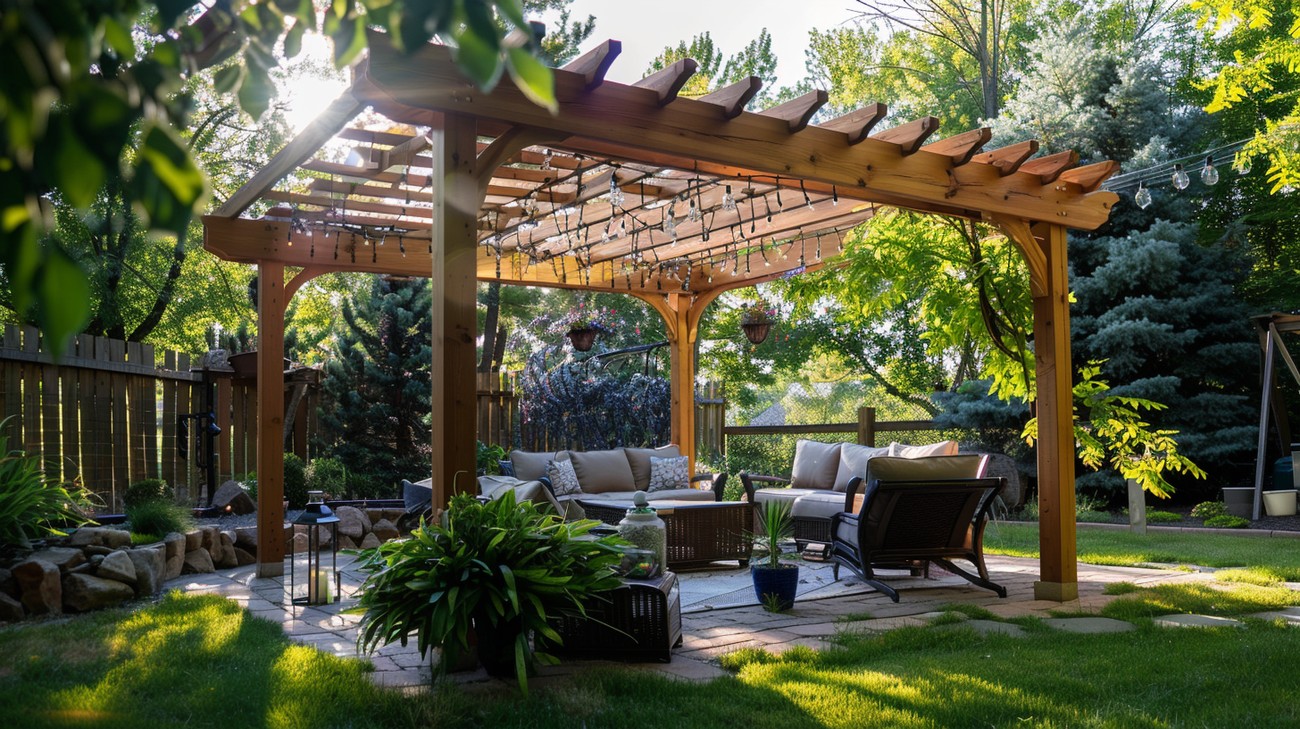
Installing a pergola can transform your outdoor space into a stunning retreat, providing both aesthetic appeal and functional benefits like shade and shelter. Whether you’re envisioning a cozy outdoor lounge or a space to entertain friends and family, the process can be simplified with some preparation and the right resources. Understanding the materials and styles that work best for your specific backyard can make all the difference, and it’s an exciting project that adds value to your home.
If you’re ready to enhance your property with a beautiful pergola, we’re here to help! At US Quality Construction of Columbus, we specialize in pergola installation, ensuring that your vision comes to life with quality craftsmanship. Feel free to reach out to us for a free estimate or to schedule a consultation. Let’s create an outdoor oasis that you and your family will enjoy for years to come!
Tags: outdoor living, backyard improvement, structural design,


